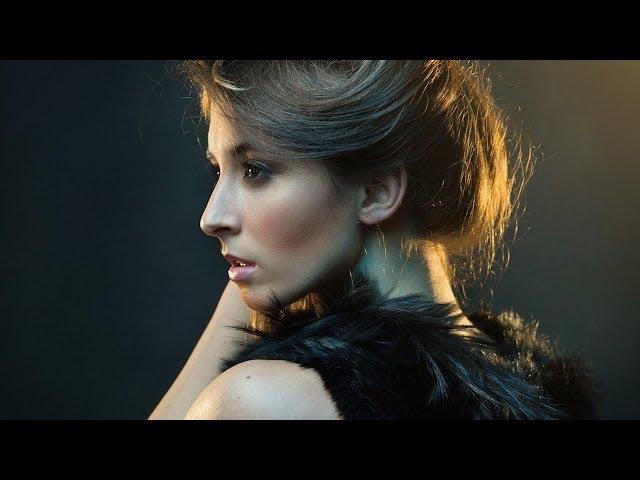
Amazing Trick to Recover Shadow Detail in Photoshop
Комментарии:

Wow, this was awesome!
Ответить
hi! the tutorial is great!!! but what do you do when the pic's resolution is low. like 600x800 px, 72 dpi?
its a black top with dark shadows that you almost can't see..
thanks for the help!!

Thank you, thank you, thank you! I really needed to know how to do this and now all my photos look amazing as opposed to being half in shadow and just blah :P
Just discovered your channel too, looking forward to catching up on all your amazing lessons, tips and tricks :D

Hi thank you very helpful. Can I ask which graphics pen you use please?
Ответить
Thanks for the tip! I've used the shadow/highlights adjustment before but didn't think to layer mask it before. I like that I can do that and open up shadows on my subject but still keep my background dark.
Ответить
How to colour correct an image using Lab Color in photoshop
Ответить
Epic!!! Thanks again man 👌👆
Ответить
Do you have a video on a bokeh tutorial? Like those shiny luminescent bubbles in the background
Ответить
Tell you what I bet Aaron has more fun reading the comments than we do chuckling at his lovely sense of humour and let's not forget his great teaching skills.
Ответить
When I do the layermask and it attached,I see nothing being painted white, nor black when brushin over it on the actual picture. but on the layers dialogue the black does get white spots. so which one of settings is messed up?
Ответить
Hi, Just want to say, your tutorials are excellent. I have been using photoshop for years but have been stuck using it the same old ways. Your guides have shown me some amazing things! most of the stuff I could do, but compared to what you have been showing, my ways of doing things are much more time consuming and complicated! Thank you so much!!
Ответить
***** Great tutorial, i'm going to try this out as an alternative to initial re-touching in Camera raw or lightroom. I love the power of the shadow/highlight controls in camera raw but I would prefer to be able to use one program for everything to do with exposure, highlights, shadows, sharpening etc. I would be interested in what your views are on how photoshop compares against camera raw or lightroom as a tool for editing. How do these fit into your work flow if at all? Do you do your initial processing or RAW files in lightroom/camera raw first then move to photoshop. If so how much how much do you process in camera raw/lightroom?
Ответить
If you have camera raw or lightroom would it be better to do it in those first?
Ответить
You are genius
Ответить
Great stuff. Simple easy and a bonus. Thanks Aaron. You are bound to see me here often.
Ответить
How can I change color tones of shadows and highlights?
Ответить
Good technical info. The last part looked weak though. Was better with just some subtle shadow enhancements.
Ответить
I need this. Thank you.
Ответить
Great video. I always look forward to seeing these.
Ответить
You, sir, are the man!
Ответить
Is there a filter that would allow me to filter the word "cool" out of your video?
Ответить
Great to see this highlight effect - I was a bit lost as to what you did though. A bit too quick, but I think I got it by the third viewing. Now to test....
Thanks.

You already explained this "trick"...... Several times....boring Nace
Ответить
I'm addicted to all your tutorials. It's my one-stop for everything Photoshop. I've learned so so much.
Thank you so much for explaining everything so clearly and making it entertaining as well!

Thank you so much . when i see videos of this channel , it keep me working more on photoshop and love to see more videos thanks again
Ответить
hi - why not do this in the raw editor
Ответить
I'm a big fan of you guys! Great tutorials! Always helpful! Really enjoyed this episode!;)
Ответить
"here we go" 5 times per minute :)
Ответить
Shoutout to the assh*les who focus on some words you guys repeat and ignore the good materials you're sharing with us. Thank you guys for the efforts and the great tutorials
Ответить
so awesome you're the Absolute best!!!!!!!!
Ответить
You do SUCH a great job Aaron...thanks!
Ответить
You are a genius!
Ответить
love this shadow detail trick .
Ответить
When you clicked before and after It seemed the girl blinked, such a difference there was in believability. On a practical level, my hobby is anomaly research, and the condition NASA leaves their pictures in for ' public release ' is awefull. There is overdarkening and overbrightening ( glarish ) etc. The techniques you presented are certainly a direct aid to overcoming these purposeful obfuscations to a degree. thx for the fine tutorial PH, much appreciated. -George
Ответить
Please tell me the background song you ever use! PLEASE!! Thanks in advance, great tutorial like ever. =)
Ответить
Thank you so much, again! :D
Ответить
your videos inspire me to me embrace being a "perfectionist".. I found that shadows can also be enhanced by creating a luminosity mask ( ctrl/click the RGB channel>invert ctrl-I>create mask. Select newly created mask using ctrl/alt/shift and create a second mask containing "darker information"), which can be selected as the masked layer of an exposure adjustment layer. It seems to work the same as painting it in, but saves on the painting part.
Ответить
Thanks Phlearn, as always, you are amazing sir.
Ответить
What's the keyboard shortcut for before/after in full screen mode?
Ответить
awesome
Ответить
Always awesome 🌟 🌟 🌟 🌟 🌟
Ответить
you're faster than lightning, but so knowledgable. Thanks for thinking outside the box, and sharing it.
Ответить
ur tutorials are so good and advance.....so help full thanx man
u so cool

pick a look
Ответить
Thanks so much.
Ответить
When I click option and mask... the whole thing disappears
Ответить
Super
Ответить
Extremely helpful - THANKS SO MUCH!
Ответить
you just invented a really complicated way to throw a vignette and gradient on top of your brightened image. You went so far off of the woman the whole task became pointless. And you left your gradient at full opacity.
Ответить


