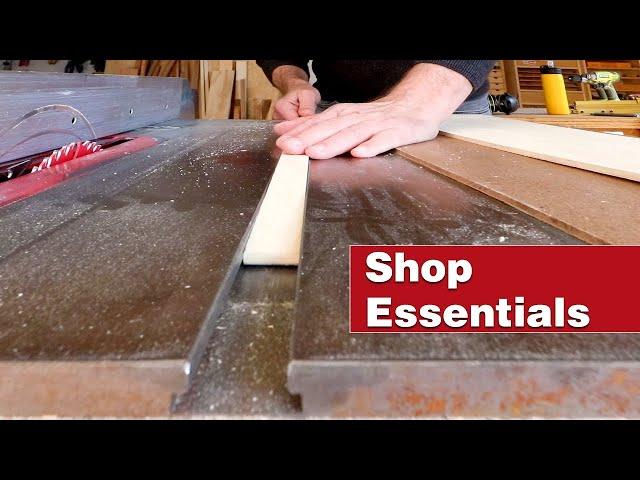
The simplest table saw crosscut sled on YouTube. Essential woodworking shop project.
Комментарии:

Great video but I do recommend squaring the fence to the rails on the table - that's your direction of motion, you just hope that the blade is parallel to that, but it's not a guarantee and there's always some tiny error there. The blade itself is referenced to the rails, so that should also be the reference for the fence.
Ответить
Had this on in the background and I laughed out loud at the nut joke.
Ответить
Best sled video. And I have seen one thousand, seven hundred, and one of them.
Ответить
Any tips or suggestions if your table saw only has 1 slot?
Ответить
one tip i've seen in other crosscut sled videos, once you dial in the width of your runners, cut up a bunch of them for later.
Ответить
Was wondering if epoxy could be poured into a lined T track to make runners, they are prohbitively expensive this part of the world.
Ответить
Thank you Steve, no nonsense video. great watch mate. cheers!
Ответить
Sir. i have 3/8 piece of hard wood would that be ok and do i still need to put nuts or what ever to raise it. i have learned so much from your videos thanks.
Ответить
I'm getting kickback cutting 2x4s using this sled. First time I am having trouble. Anyone might know why?
Ответить
Love the safety features you added. Thankyou for a great tutorial.
Ответить
I saw a video were the guy made them taller than the slot, that the only part of the sled that touches the table is in the slots.
Ответить
Nice video, thank you Steve
Ответить
Nice!!!
Ответить
My old Craftsman table saw has miter slots with two "notches" on each slot, so I cannot make the runners slide without running them under the notch. Is there a solution for this?
Ответить
Its good to hear inches
Ответить
Impressive instructive video. What is the maximum length boards you are able to cut using this sled?
Ответить
Why front fence?
Ответить
No true accuracy with this sled Pathetic.
Ответить
Squaring up the back fence is bullshit.
Ответить
👍🏾
Ответить
Finally got round to making this. I'm using it a lot and it has transformed my crosscuts on the table saw. Many thanks.
Ответить
Steve, I made this sled in about 4 hours, including the time it took the glue to dry. Thank you for making this so easy to understand and to make. I left your video up on my computer as I went from step to step, as a reference. I made this for my 40 year old SKIL table saw. I offset it to the left so I could use my rip fence as a guide, as I don't have table extensions. I can't believe I waited this long to make a sled, but once I watched this video I realized I had to make one. Thanks again for showing how to make things easier to do. I am pretty sure I will end up making one for my son as well.
Ответить
Love the ideas of simple safety features and squaring procedure.
Ответить
You could buy some cheap miter gauges and pull the rails (runners)off to use them. No expansion or contraction with humidity.
Ответить
Good job though...i need this..thanks..
Ответить
Swivel side down , solid jaw on the clamp on top..stops movement of work piece..
Ответить
Best sled-making video I've seen!!
Ответить
What if your table saw only has one miter gauge slot??? Thanks
Ответить
Excellent!!!
Ответить
I have a hand me down table saw and the fence wobbles a lot. How do I get the runners cut straight? And do I just measure the slot for the runners?
Ответить
Very straightforward and informative. Thank you.
Ответить
I'm a beginner and had no idea how to make a sled thanks to your video I do, you made it simple to understand, thank you sir.
Ответить
I think you mentioned SketchUp to design a lot of the projects you do. I can’t find any part of it that is for people with no experience in using this software. What am I missing?
Ответить
Great sled! Oh I miss my SC Johnson Paste Was.. wish they never stopped making it. I do have the Minwax but it's not as good as the SC Johnson stuff was. This sled will be the one I make for sure. Thanks!
Ответить
I've been watching you since you first started...Thanks!
Ответить
I did woodworking for several years and junior high in high school, and my teachers let me run everything, including the table, saw lathe all of it. The teacher can’t do that these days so I used a big huge sled on the table saw. Of course, in school. Those saws are very powerful. There was a bully that was picking on me in the school happen to be in that class so when I used the powerful planer, I ran oak through it, I said, I’m gonna fix that guy. It threw all kinds of pieces of wood right in his head. I already knew it would do this already was that sharp at that age. For some reason I’d loved woodworking.
Ответить
Love, love, love that you are not using a SAW STOP table saw in this video; makes you more relatable. Thanks.
Ответить
..."remove my nuts....testis out..." :-) was that on purpose? hilarious, thanks for the great video
Ответить
Thank you for this excellent video!!! 🎉
Ответить
Steve, you said in your zero clearance plate video that you were not convinced that zero clearance inserts make better, tear out free cuts?
Ответить
Why do we need to double the thickness on f the front and rear fences? Isn’t 3/4” thick enough?
Ответить
I just built a version - thank you, Steve!
Ответить
Thanks for the video. Made it look easy. Although, my thanks comes 2 years later, lol
Ответить
Useful project. Well explained. I'll make mine next week. Thanks for a great vid.
Ответить
Great video. Simple and too the point
Ответить
Great job Steve! I watched a few of these “How to make table saw sleds.” Many were bogged down with math on how to achieve a true cut. You took the Einstein out of getting this done without all the unnecessary calculations! Sometimes I think others like to grandstand or bloviate to their audience there knowledge/knowhow to impress instead of teach in a manner that the everyday layman can relate too. I subscribed to your channel because you keep it simple yet good!
Ответить
