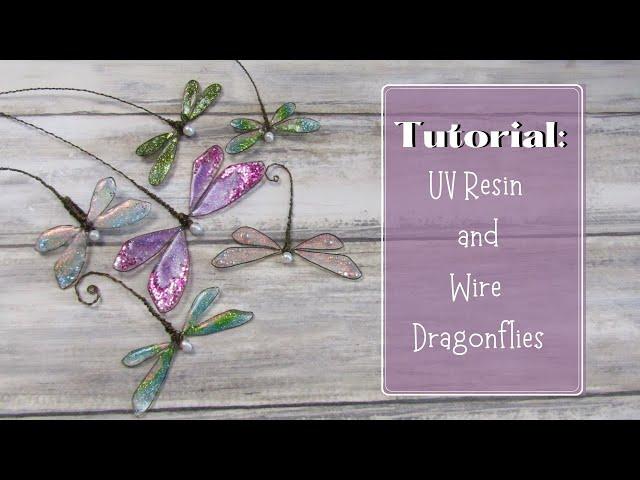
Tutorial UV Resin and Wire Dragonflies
Комментарии:

Love these dragonflies. Thanks
Ответить
Lindo pero...... Yo no le pondría taaaaanta escarcha, las dejarías casi naturalitas
Ответить
Very cute. Ive done these with cloissine wire and less smelly 3d glossy accent or dim. magic...did flowers of nail polish when i was on extended travel w min supplies.
Ответить
These are stunning, absolutely gorgeous. I think i will have a wee go at them. 😊❤
Ответить
I’m not sure which way you use the tape is it sticky tape up or down on the wire when you put the resin on
Ответить
Bravo c'est merveilleux 😍
Ответить
Thank you for your tutorial! I'm new to resin, but have been making beaded dragonflies for some time now. I kept thinking resin would be perfect for the wings. Now I am confident I can work with the product and have great results!💕
Ответить
Wow! Those are so beautiful and fun! I really love them all and thank you for such a thorough well done video.💜💜💜
Ответить
Beautiful
Ответить
Beautiful Art and work. Thanks to you.
Ответить
Hola , impresionante las libélulas , me puede decir dónde consigo la resina y la lámpara ? Gracias ,
Ответить
What do you use for the underground? Is this hard plastic? Don't get the uv stikcy on it?
Ответить
Beautiful... thanks
Ответить
Really lovely x
Ответить
Thank you for sharing these beautiful pieces of art; I cannot wait to try. ❤
Ответить
Luvly 🥰
Ответить
Lovely lovely tutorial❤
Ответить
Love these
Ответить
Oh these are so fun, and beautiful!
Ответить
These are beautiful. Are you painting on the front or back if the wings?
Ответить
Gorgeous!
Ответить
These are wonderful.
Ответить
Lovely new subscriber
Ответить
I watched your tutorial quite some time ago, and these are so cute!!🤩 I finally got some wire, and tonight I followed along, and started making these as some whimsical Christmas tree ornaments. That are so fun to make and so pretty. Some might say dragonflies aren't Christmas-ish,... But the shiny wire and sparkly wings are beautiful on my whimsical little tree. Thank you for sharing this tutorial!💖 So glad I finally got to make these.😊
Ответить
Beautiful and you make it look so easy. Thank you for sharing
Ответить
There’s millions of ideas these are glorious ❤❤❤❤❤
Ответить
So clever
Ответить
They are beautiful Gi x
Ответить
❤❤❤❤
Ответить
Oh beautiful
Ответить
love love love them to amazing would be nice to see you make a butterfly
Ответить
Thats so pretty ❤
Ответить
Thanks I want to do this good job God is good Jim’s wife Tara
Ответить
Beautiful
Ответить
I LOVE these. You inspired me to give it a go. I love how they turned out.
Ответить
For what it's worth, some isopropyl alcohol (91%or higher)will clean it off your hands and tools as long as you catch it before it cures.
Ответить
Beautiful!! ❤
Ответить
If you want to do away with bubbles, lightly spritz with rubbing alcohol. Preferably, using 99%. The bubbles magically...poof! ❤
Ответить
Thank you.
Ответить
Beautiful!
Ответить
Why doesn't she use a piece of silicon mat when she puts it in the UV oven instead of parchment paper?
Ответить
I really like the dragon fly demo. I worry your are not wearing gloves or a mask. I didn't know I was suppose to use them when I started using resin not to mention the smell. I got thinking of I got resin in my eye and was close to the UV light, it could really damage your eyes. Maybe even smelling the resin I worry it will cure in my lungs and do that too. Please take precautions. Keep up the videos 😀
Ответить
❤❤❤❤❤❤❤❤❤❤❤🥰🥰🤩🤩😍😍💙🤍💙🙏😘👏💯
Ответить
So cute!!❤❤
Ответить
I just found this. So so pretty. Have you tried yo make angels this away
Ответить
Hello! Beautiful! What are the qualities of the thin resin layer? Is it flexible, or brittle? How strong or fragile? Is there anything you could compare it to?
Ответить
Do you have a link for the uv machine? Those are beautiful
Ответить
Have you tried curing them on a mirror. I use a mirror for all my uv resin projects it seems to cure better.😊
Ответить
Oh! How I wish I had seen this video a week ago!!
Ответить
Love these, thank you for sharing!
Ответить

