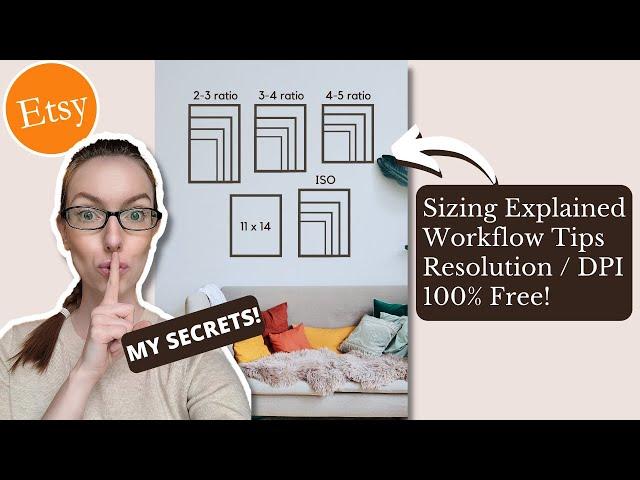
How to create Digital Wall Art for Etsy | MY SECRET WORKFLOW explained! | Sizing, Resolution, GIMP
Комментарии:

If anyone is looking to jumpstart a digital wall art store, I'm selling my brand with 237 ready-made listings, including listing images etc. Feel free to reach out if you're interested!
Ответить
hi and ty so much thi is so helpful!! I have been using GIMP now, but i cant figure out how to set the safety zone trime zone and bleed, can you please help ¿¿
Ответить
Is 240 DPI fine or must they be 300DPI? I’ll be selling beach pictures for printing
Ответить
I can't figure out how to double check that my properties are 300dpi. I don't know what program I need to be in to see that.
Can you help me

This is so very helpful and you ara a fab teacher , very easy to listen to. Could I please ask where you store your images and how the customers get the link to download? Would it be dropbox or can you store on Etsy? Ive not opened my shop yet just doing the research|! Thank you :-)
Ответить
Thank you so much I needed to understand this
Ответить
This was incredibly helpful thank you so much!!
Ответить
Thank you! Something so new, you helped me understand exactly what I needed. God bless you!
Ответить
This is so insanely helpful. The amount of value packed in this free video is incredible. Thank you so much!
Ответить
OMG, thank you so much for explaining sizing. I was actually creating all of the sizes when all I needed to create was just five sizes and the customer can scale it down once they buy it. This video was a life and time saver (and you didn't charge for it or have 100 videos to watch). THANK YOU, THANK YOU, THANK YOU!!!!
Ответить
Thank you so much, very helpful video!
Ответить
Thanks for explaining!! So basically you adjust each time the size of the heart, so that it looks good? It's not like I have to do math to calculate the best heart size for each ratio? Like if for ratio 2:3 my heart height is 5 cm (random numbers) do I have to apply the rule of thirds to find the size for the 4:5 ratio? I'm confused.
Ответить
❓ I've been running around in circles with this 300dpi. It was explained in various other places that the 300dpi meant you can print at one size larger than the scanned image eg, an A4 artwork with 300 dpi selected can then be printed up to A3. But you're saying and I've seen other say the same too, but not explained where I understood. But if I've understood you correctly the aspect ration is with the 300 dpi is what is key to printing larger sizes?
Also can I ask why jpeg and not tiff please? As I've also been seeing that recommended.
Thank you again this is, suchba helpful video.

This was so very helpful thank you.
Ответить
great video
Ответить
Thanks for explaining the pixel dimensions divided by 300dpi
Ответить
Your video is very helpful. However, have things changed in Gimp? I tried to create a 2:3 ratio file, 7201X 10800 in RGB, and the message I get is that I'm trying to create an image with a size of 724.8 MB, the maximum new image size in the Preferences diaglog is 134. 2 MB. Is there a work around?
Ответить
Thank you for taking the time to make this video. Would it be the same/similar steps to resize photographs? I am currently setting up my Etsy shop to sell my travel photography. Thank you in advance for your response.
Ответить
Thank you so much Brittany, this was really helpful.
Ответить
When creating your art, do you make space for a frame?
Ответить
Nice, thanks!
Ответить
This video was just what i was looking for. Thank you so much for this golden information. <3
Ответить
Thank you so much for this video! Informative, amazingly helpful and finally easy to understand! Yeah, can’t thank you enough how simply and well you explained it all! I wonder if you could make a video how you would downsize these images for the listing photos? I imagine the file sizes are massive!
Ответить
Thanks so much for explaining these little details. I've been searching all over online for this for a while now. I really admire how knowledgeable you are about this stuff. 🙂
Ответить
Thanks for this tutorial. My only question is, how do I import an already created image like a jpg or png file that I've created and put it into the layer?
Ответить
Thanks
Ответить
I'm so glad I came across this video!! It helped so much, I've been putting off creating my shop because I was so confused about the sizes. Thank you so much!! New Sub!
Ответить
Thank you so much!
Ответить
O my goodness, you understood the assignment! What a awesome job! Thanks Brittany!
Ответить
Yours is the only video after much searching.... that actually takes me through the process... and in a simple way I can understand.
Do you have a next stage video please? Of putting all the files on etsy?

this is awesome 😍
Ответить
This helped so much. Not many people go into so much detail . I have put off uploading because I struggle with sizing
Ответить
Hey, don't know if you still answer questions here, video is older, but is there any difference when I scan all my stuff in 600dpi mathwise? You always divided 7200 and so on by 300 and it fit fine into the biggest version of the ratio, when I do that with 600 that of course doesnt fit anymore, even though the quality must be better.
Also, how do I stay true to the dimensions when I scan art instead of painting it digitally? The things I scan are, with 600 dpi sometimes 2200x4000 or something, will it still be sharp when scaled bigger, if I copy the motive onto the prepared 7200x10800 template and scale it accordingly?

Thanks a lot ! You saved me a lot of time !!
Ответить
This was extremely useful, got you a sub too 🫡
Ответить
Hi Brittany, love the videos. Can you please let me know how to add a jpg after adding the layer. Do I just drag it in? where do I put it in the layers section? Cuz when I drag it in, a third layer is added and it makes the art layer pointless.
Ответить
Your video was helpful. I feel like I learned a lot, especially with the sizing and resolution.
Ответить
Good explanation.
I actually created a gimp python plugin which checks for new created art in a folder and then creates the scaled files automatically.
Then it puts the image into the mockups i declared in my script and saves them.
Then it automatically executes an .exe i wrote in python and uploads all the files into a google drive folder.
Then it creates a link which is put into a pdf placeholder and saves the pdf to a desired location.
I can comfortably work with all these files on etsy then.
So all i have to do is create my artpiece and execute my plugin.
If anybody is interested, tell me.

Thanks for this tutorial.. but what about mockup u use for showing ur art.. is it free and where to download mockups?
Ответить
Thank you Brittany, for you I understood everything :') I felt so overwhelmed with this at the beginning, thanks to you not anymore :')
Ответить
Hello Brittany , and thank you very much for this information , was extremely helpful : ) question , on your files , the biggest size you have ( 2-3 ratio: 7200 x 10800 ) how big is the file size in MBs ?
Ответить
I love your content, thank you
Ответить
Thank you so so much this helps me times A million!
Ответить
How do I put the image/art that I have in the art layer?
Ответить
Hey Brittany o/
Thank you for the video btw.
Im still trying to understanding DPI and width height pixel better and my favorite way is by doing.
I made my 3:2 ratio art ( 3 in width 2 in height) scale to 300 dpi but my pixels are only 5600x3733 which is half of yours, what does it significate? does it mean my max I should go with is 12x18 to not have my image blurry?

This is truly life changing! I cant tell you how confused I've become with all the resizing etc... You've lifted the veil and now I understand. Forever grateful - Julie ❤
Ответить
How do I add a saved file of my art into the templete
Ответить
If you are creating an image in a another program could you just click in the background then “image add as new layer?’?
Ответить
This is the best tuto ever. Thank you so much for sharing this.
Ответить
Can You put this designs in a any horizontal framed?? Nobody talks about it, I tried to put it in printify but the design won't fit, can You please help me
Ответить

