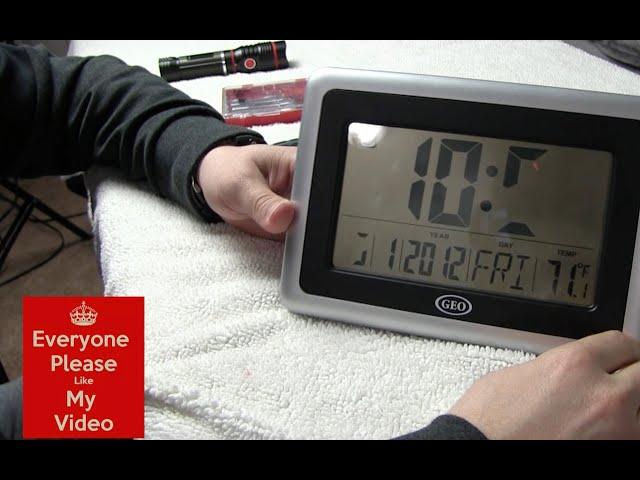
Fix Missing Numbers or Unreadable or fading Time / Display / LCD
Комментарии:

Thanks for posting this! The LCD on my OXO Digital kitchen scale was having the same issue, and your fix worked for me too! You helped me save money and prevent electrical waste! 🙌
Ответить
how about when the display very dim really hard to see
Ответить
Brilliant! Thank you, Dan, for teaching us how to restore the display on a digital clock. Your step-by-step descriptions were outstanding. Very thoughtful of you to adjust our view so that each image was clearly visible. The world needs more educators like you!
Ответить
Please help my watch has this can you give me the tutorial??
Ответить
هذه الحالة شاهدتها عشرات المرات خلال ممارسة مهنتي تصليح الساعات و طريقتك هذه تعطي نتيجة في مثل هذه الحالة و لكن على الأغلب لا تكون ناجحة
أتمنى لو كان هناك مزيد من الطرق لإصلاح هكذا أعطال

Hoping the reverse lcd works on the same principle... Having a similar. Issues on a braun clock.
Ответить
You can use eraser to rub and refresh metal contacts. It is safe and easy 😊
Ответить
Thanks, very usefull video 🙂
Ответить
Falou muito pra fazer o que todos sabem
Ответить
Es hat geklappt, vielen Dank!!
It worked, thank you very much!!

I have done same many times as you did but you demontrate in a precised and deep manners. Thanks to shared your live demonstration. Excellent
Ответить
iso propyl alcohol,.. clean contacts,...dry fix back,....
Ответить
Now I know how they work, I won't thow the next one away - I will clean it!!
Ответить
Hidanthetechnologyman & Everyone i have a washing machine with faded and missing lettering on my washing machine digital control panel, PCB i think it's called, can someone please help me so the letters & numbers are visible again, I think it has ribbon connectors, would cleaning thé connectors make letters & numbers visible again, thankyou in advance. Great video thankyou.
Ответить
Can home dry cleaner used to clean the contacts or it's only alcohol
Ответить
Thanks for explaining things so clearly and patiently.
Ответить
My alarm clock has recently started missing segments in the numbers. Taking it apart revealed that it uses a plastic tape connection, not a zebra pad. So I thought directly heating up the LCD panel may help fix it. So whilst still apart I heated up the LCD panel with a fan heater on high for around 5-10 minutes whilst intermittently lightly massaging the panel. I had batteries in it at the same time so I could see any changes. And to my surprise it worked! all the missing bits came back. So if your device uses a plastic tape connection try blasting the LCD directly with a high heat.
Ответить
Thank you! You helped me fix a small timer for my kids!
Ответить
That strip is called a Zebra Strip.
Ответить
I didnt get lots of ads
Ответить
Bravo Zulu.
Ответить
Thanks!
The bottom row of units of my clock have a dark cast masking them in parts.
Untill I get the time to deal with it, I can read the figures using a torch.
I have done this before and hope I can reclaim my clock!
Another clock came back to life all on its own!

Часам 12 лет, сильно!
Ответить
I have the same problem with my multi tester display, i was clean like yours tips but nothing happen 😢, what should i do next
Ответить
For the price on much of those type of electronics, people just throw them out and get a new one. We live in a throw away society today. I have fixed so many upright vacuum cleaners that just needed a new belt and a good cleaning. It is good to see someone fixing something that can be fixed. I usually give it a try, if I cannot fix it, it goes in the junk.
Ответить
Phenomenal
Ответить
Pro tip: use a white Staedler eraser to thoroughly clean the gold fingers contact. If any residue gently blow on it.
Ответить
ZZzz Z z Z z z ZZ zz Z Z z z
Ответить
Magnificent
Ответить
Those enelopp batteries are rechargeable and only 1.2 volts each,
Ответить
“Don’t scratch the circuit board”. Then he scratches it!
Ответить
So awesome! Thank you!
Ответить
Yes, the first attempt (test fixes should proceed from easiest to harder, usually in terms of how much disassembly is required) is reseating batteries and if necessary replacing batteries typically with non rechargeables to test then fully charged rechargebles to redeploy if the previous made the display work. Once inside and noting the wire harness was where you pressed and achieved contact and also noting those protruding screws, I would have tightened those screws down to see if that produced a fix, if not then digging deeper into the mechanisms as you immediately proceeded (of course you did that to provide a complete tutorial.
For success: carefully note and remember the step by step disassembly process, so you can reverse that at reassembly time, and keep friendly cat off the work table and keep windows closed to prevent wafty winds at bay.
Of interest is most people would consider this device to be electronic, but note all the purely physical components - fasteners and conductive pressure fit contacts as functional parts not just casing or encapsulating the machine - hence my use of 'mechanism' (though it's no where near being a mechanical clocklike device where powering is via springs (compression release), pendulum (gravity), user presses, turnings and crankings).

large screw on hold down, smaller screw goes on screen hold down.
Ответить
do not over tighten screw's
Ответить
he's so gentle that it's amazing to see him touching it at all.
Ответить
As he will destroy everything he touches. It is the Libertarian way.
Ответить
Good way to keep so much discarded items out of landfills. Sometimes it’s just a simple fix like this that can breathe life back into an electronic device that’s old but still quite functional.
Ответить
Thank you for the handy instructions. It helped.
Ответить
Yeah, I tried it but it turned out the display was soldered to both
the LCD module & the control bd, so, the device went into the trash.
!

Just a few things that I have found over the years. For black rubbery looking contacts, alcohol is correct. For dulled metallic contacts, I'd use Deoxit cleaner conditioner, because this leaves a semi conducting residue on the metal contact that seals it against oxidation & promotes conductivity. This is a much longer lasting solution than simply cleaning the metal contact with alcohol, only to be exposed to the air again. Also, I have found that whatever cleaner you use, using a paper cleaning pad is much more effective than cotton at removing metal oxide films & restoring lasting conductivity without roughening the contact surface. Yes, paper is a but more abrasive than cotton, but still leaves the metal contact polished. Doing it this way tends to give a more reliable & durable fix on the 1st attempt. Also, when reinstalling screws, I gently turn them backwards until I feel the screw drop into the threads, then do them up, knowing the the threads are properly engaged. This detail means the equipment remains serviceable much longer as you don't end up with stripped threads all over case and mounting posts. It possibly doesn't matter with something that size, but I tend to just get all the screws fitted loose & check everything is aligned before nipping any up for the final time. It just allows the parts to settle in evenly together.
Ответить
A well done video that also may explain "The Mysterious Case of the Missing Digits" in all displays of this type! Sometimes the Yaesu 450-D amateur radio transceiver has this "ghosting" problem, and ditto for many multimeter displays, including both the cheap AND some pretty expensive ones that come with yellow plastic cases. 😂. So your fix may possibly work in these cases as well! I'm going to be using a lot less cotton swabs in the future, I do wonder about microfibre vs the cotton shirt. I've also played with that rubbery and yet conductive interface as part of the autopsy of failed or junk devices. I believe it is called a "zebra" connector, and I think it alternates a rubber insulating material and a conductive material, though I can't figure what the conductive material is actually made of. 100% right on about either you fix something or not, either way you learn more. And wow this is such a simple fix! All the Best! 73 DE W8LV BILL
Ответить
Hi Dan, excellent video. i have an old school pager, and my numbers are fading. How can i fix this in such a small screen please?
Ответить
Great job Dan! Thanks!
Ответить
Thanks again.
Ответить
You have explained the procedure very nicely. Tell me if there is erosion on either side than what should be the line of action.
Thanks

Great tutorial, especially having a white fluffy bench cover so stuff does not roll or bounce away.
Ответить
The way you describe the process is exemplary. The smooth and logical flow of words makes it very easy for me to follow what you are doing, and I think it is also the main reason why so many other people enjoy the video. Well done.
Ответить
لكم الشكر هل يمكن استعمال البنزين للتنظيف بدلا من الكحول
Ответить
To clean the contacts on the pcb, use a pencil eraser and buff until shinny. Then, clean afterward with 99% alcohol or Deoxit electronic grade cleaners. Look for cleaning swabs where the cotton is anti-freying (applied to the stick tightly wrapped or compressed)
Ответить


